The basics of using Dynamic Grading by example. In this video we quickly build a rough mix out of 3 tracks: Drums, Bass and Guitar. To do that, we simply adjust the track dynamics one by one, while listening to the tracks solo.
In the following video you see a typical workflow with Dynamic Grading to shape signal dynamics so they sit strongly and cleanly in a mix. In less than one minute per track, you end up with a nice rough mix, without even having to listen to the mix bus while making the adjustments to each track. Watch the video and continue reading to learn more about the process.
1. Drums
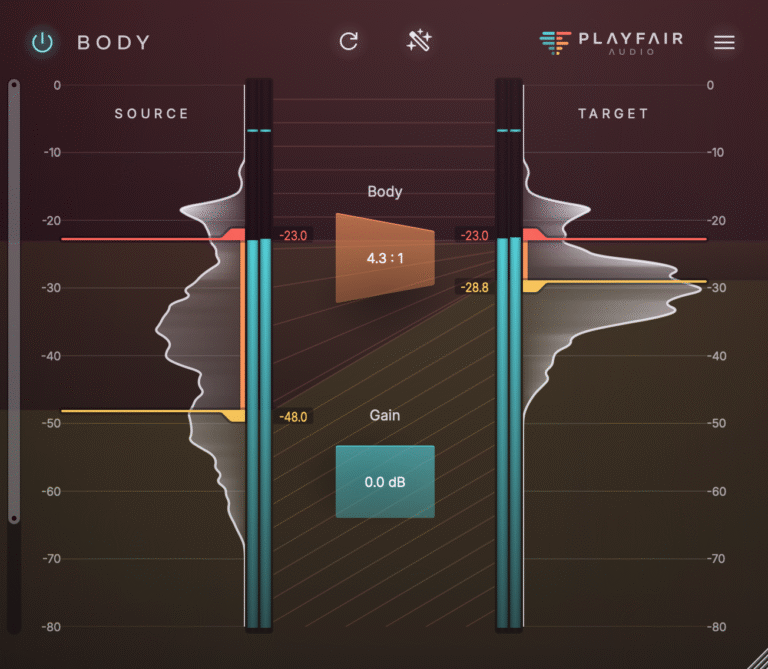
We start with the drum bus of the simple loop. The first step after adding Dynamic Grading to a track is always to play back the track, let the dynamic histograms build up, and then identify the relevant dynamic regions: body range, high and low tail.
The body range is where the bulk of the musical information is. You recognize it in the histogram as a more or less pronounced mass center. In many cases, the body range is more dynamic than wanted, especially if it’s supposed to cut through a busy mix even when listening in noisy environments. So ver often, you want to compress the body range to make it more densely concentrated around some center of gravity (more on that later).
Traditionally you would use a compressor for this, but that also compresses the high tail, which is where transients, attacks, the “punch” lives. In Dynamic Grading you can adjust the dynamics of this part independently, so you can heavily compress the body range, while preserving or even enhancing the high tail.
Compressing the body range often comes at a price: you’ll also bring up reverberation and noise, which lives in the low tail. This is easy to compensate by expanding the low tail down. If you exaggerate it, you can easily make a signal more dry and clean.
2. Bass
The bass track is treated in a similar way. By compressing its body range, the individual notes become more consistent and the bass can lay a strong harmonic foundation for the song. In this example, the 5-String’s B string is however quite problematic, as it’s not very well damped and rumbles between notes.
The problem is exaggerated after compressing the body. But it’s easy to get practically completely rid of it by expanding the low tail.
Add some additional punch in the high tail and we end up with a nice and clean bass track.
3. Guitar
Again compressing the body range of the guitar track, we get the main notes and the ghost notes closer together, making the instrument easier to place adequately in a mix without running the risk of some notes sticking out too loudly.
As the track contains some echo and reverb, the body compression exaggerates these. Again by expanding the low tail, we can make the guitar nearly completely dry.
With a bit more emphasis of the high tail, we get a nice and tight track that doesn’t sound overcompressed, even though we heavily squeezed it in some parts of the dynamic range.
Adjusting The Levels
When working like in the video, you can basically leave all faders at 0dB and just build the mix one track at a time, and already put them roughly in the place where they belong according to their role in the mix.
With the intuitive control handles and histogram graphs, you can easily eyeball where the signals happen. By moving all target handles at once, you can set the output level. In our experience, targeting the region around -30 dB for the bodies of individual tracks leads to a nicely balanced mix that doesn’t overshoot. Main instruments like solo guitars or vocals will likely have their center of gravity a bit higher than background instruments like synth pads.
With just a rough idea of how you want to build up a mix, it’s easy to do the mixing directly with the instances of Dynamic Grading on each track, just by eyeballing where the most important parts are, and moving them into place.
The Result
When you get used to this simple workflow, you’ll be surprised how solid and balanced this rough mix sounds when you switch off solo mode and listen to the resulting mix bus for the first time. It’s the fastest and easiest way to start off with mixing a track.
With some more fine tuning of the control handles and by taking some more time to adjust each track’s spectrum, response and release controls, you’ll end up with real banger of a mix!