Decades of being mostly limited to compressors for dynamic processing necessitated a plethora of advanced compression recipes. One such technique is parallel compression, also referred to as “New York Style” compression. Learn what it actually does, and how it relates to Dynamic Grading’s approach .
The Almighty Dry/Wet Control
Early on, an additional parameter to control a dry/wet mix has been the most requested feature for Dynamic Grading, even back during the private beta phase. At the same time, it would be the easiest to implement. Also many other products have one. So why didn’t we just add it? The answer is threefold:
- With Dynamic Grading, you don’t need it anyway to achieve the results you want (and more)
- It would actually make Dynamic Grading harder to use
- Adjusting such a parameter doesn’t feel very good, and there are better options
The good old compressor is quite limited in what it can do. There’s really only one type of gain curve it can apply, although these may slightly differ across compressor types. However, it’s still always “just” compression. Consequently, you need to pull some advanced tricks as soon as standard compression doesn’t bring the results you’re after.
Dynamic Grading on the other hand is a much more flexible tool that lets you easily do advanced dynamic processing that would otherwise require an elaborate setup with parallel paths and several parameters to adjust, if it’s possible at all. At the same time, thanks to the accurate visual representation of audio dynamics, you don’t have to tweak around in the dark when making these adjustments. This saves valuable time and brain cells that are now free for more creative uses. We’ll see further below how this applies to parallel compression.
Further, we designed Dynamic Grading’s unique means to manipulate audio dynamics in a graphical way. This makes it more straightforward to mix with intention and clarity by adjusting reference points in dynamic space. Adding some dry signal back to the processed one alters the result in such a way that what you see is no longer what you get. And due to the nature of signal processing, mixing original and processed signals can lead to unintuitive results that can be hard to reason about. Consequently, this would make the product worse, because it’s much harder to know what you’re doing.
That said, there are typically two different goals that users may want to achieve by using a dry/wet mix. The first one is to be able to “dial back” on the adjustments made. Imagine this as a smooth bypass button that lets you explore the “space between” a fully processed signal and an unprocessed one. A dry/wet mix can give you that. But as we will see further below, the path it takes through this “space between” is not so much a straight line.
The second goal one might want to achieve with dry/wet mixing in the compressor world is parallel compression. In the following, we’ll first take a closer look at how that works and what the actual result is like. Afterwards, we’ll also further investigate the effect of a dry/wet mix. Finally, we’ll establish how to realize similar and better results with Dynamic Grading.
New York Style Parallel Compression
Parallel “New York Style” compression is a widespread technique where you add a (heavily) compressed version of a signal to the original one. That way, you get a more compact signal, but without sacrificing the liveliness of transients. Some engineers also describe it the other way around: “breathing some life back” into an overcompressed signal by adding some of the original signal. These are two sides of the same coin. No matter if you do it by routing through parallel mixer channels, having separate dry and wet faders in a plugin, or using a single mix knob that crossfades between both signals. There are countless articles and videos on the web explaining how to do it. It’s an extremely useful technique, although you’ll rarely find a good explanation of what it effectively does.
In fact, parallel compression is a rather convoluted and opaque way of achieving something that could be much easier and more intuitive. Speaking in Dynamic Grading terminology, with New York Style compression, you compress the body range, while leaving the punch and floor ranges mostly intact. To do that, you need to setup a parallel path with a compressor, and adjust threshold, ratio and dry/wet mix at least. You also have to make sure to properly phase align the dry and wet signals to avoid unwanted side effects. This can be tricky especially when you’re dealing with analog or virtual-analog compressors. Finally, you need to respect some best practices such as using a fast attack time to make sure you’re not messing up the attacks too much.
When you do it right, you get roughly the following end result in terms of a gain curve. In the animation below you see how adding a compressed signal (yellow dashed) to a dry signal (green dashed) leads to a gain curve with compression in a limited gain range, and (more or less) linear gain below and above that range.
There’s a few things going on here: the floor range is lifted by an amount depending on the level of the compressed signal. But you can’t easily figure out how much based on the mix parameters. With enough compressed signal in the mix, you get strong compression in the body range, and less and less compression towards the higher levels. There is no way to further control the recovery in that range, it is what it is.
The threshold, ratio and wet level (including the compressor’s makeup gain) all together determine the shape of the resulting effective gain curve. Adjusting these parameters accurately and with intention requires good ears and some solid math skills, along with a piece of paper and a calculator.
Crossfade Behavior
Now what if we – instead of adding a wet signal with some level, as above – have a simple mix knob that crossfades between a fully dry and a fully processed signal with some percentage? The general effect on the gain curve is similar. But the actual behavior of the parameter in terms of what happens along its value range is really interesting. And it’s a good example of how much a careful design of parameters matters when it comes to meaningful interaction with a creative tool.
Here’s a similar animation to the one above, but this time with a mix or “crossfade” implementation.
Note how the floor range stays constant in level. This is because there is no makeup gain added to the compressed signal. If there would be e.g. a 10 dB makeup gain, the floor range would move upwards over the parameter range.
However, the thing I want to draw your attention to is how the change of the gain curve behaves over the whole parameter range. For the duration of the animation, the mix percentage increases evenly. But you can see that during the first 50%, the result changes only slightly. On the other hand, during the very last 10% of the parameter range, the curve changes a lot. It basically looks like it “slaps” towards the compressed curve.
When designing equipment, software and instruments for creative use, this type of unbalanced parameter behavior is something to be avoided. If for a large part of the parameter range nothing happens, but within a small fraction everything happens, adjusting it will feel weird and imprecise. Again it will be hard to predict results and work with intention.
Dynamic Grading To The Rescue
Dynamic Grading is all about mixing with intention, being clear about where you are and where you want to be. Tweaking knobs for hours until it sounds “right” is tedious, even when you have a lot of experience on your belt. Above we already started translating the New York Style compression technique to Dynamic Grading terms: we want to compress the body range while keeping the floor and punch ranges as they were.
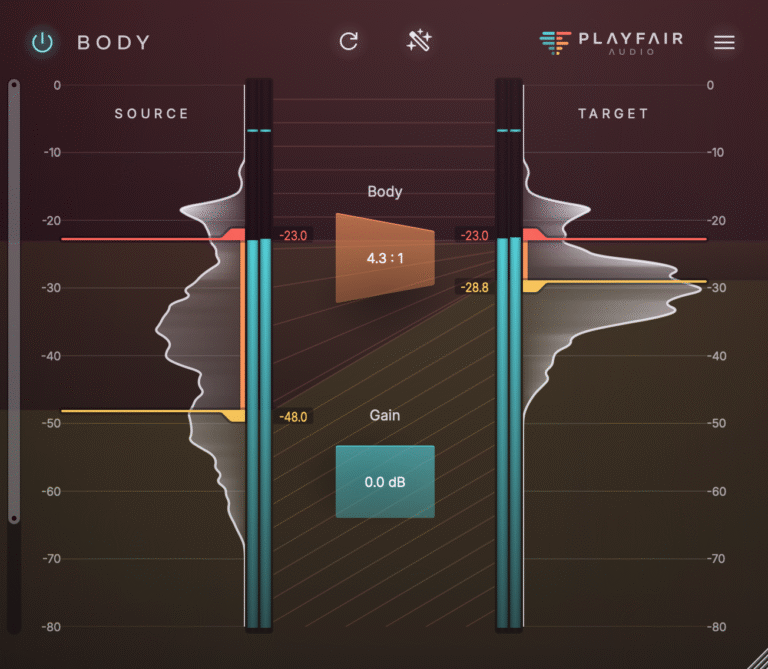
To achieve such a result in Dynamic Grading, you just set up the thresholds to determine the body range, and compress it while leaving punch and body ratios at 1:1.
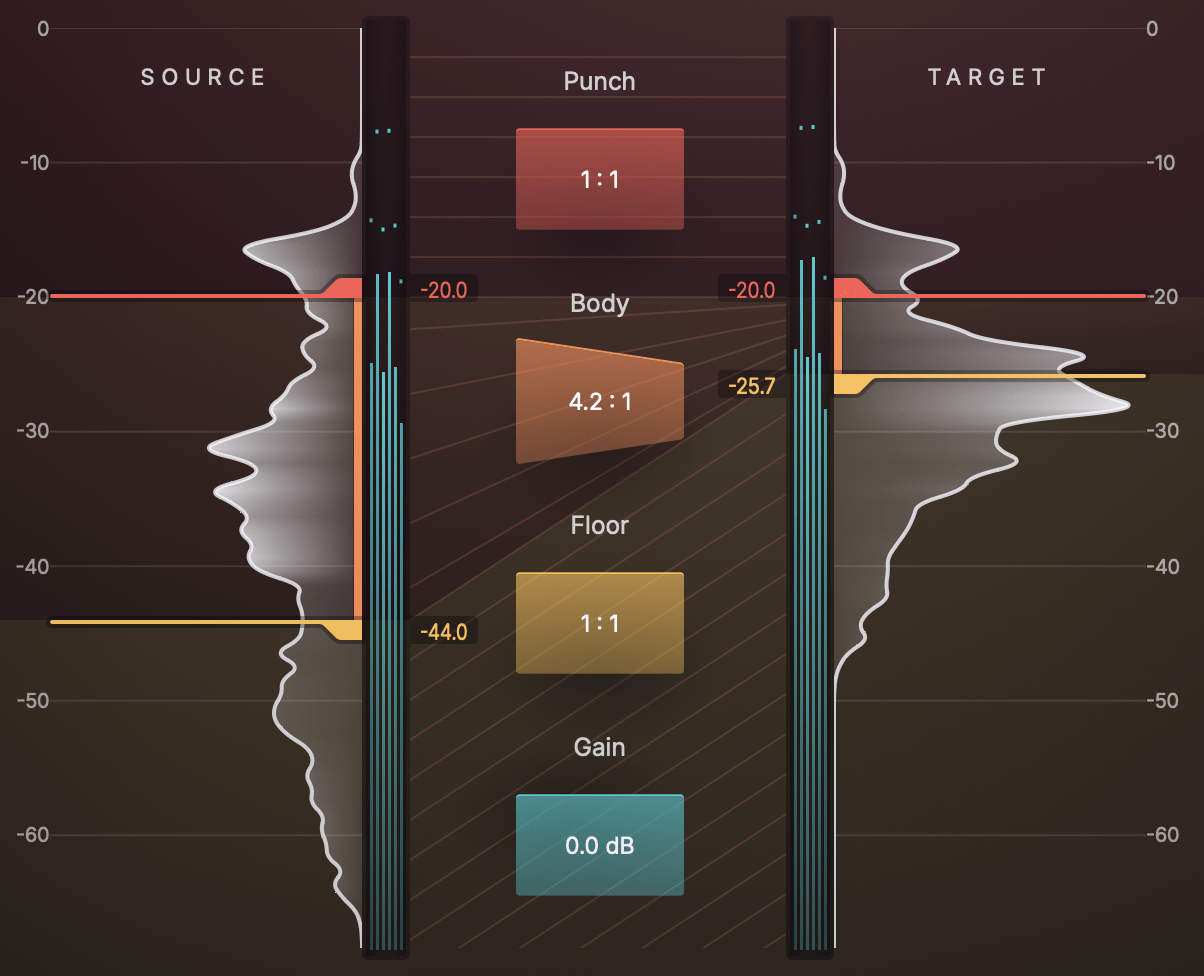
For a first rough setting, you don’t even have to listen too hard to find the right spot. Afterwards, you can still tweak the thresholds and ratio until it sounds just right. And this is only a small subset of what you can achieve with Dynamic Grading, as we haven’t even touched the floor and punch ranges yet.
A typical next step would be – for instance – to expand the lower tail to add back some more clarity and remove some of the reverberation and noise that the New York Style compression will often bring up as well. Then we’d probably adjust the punch to beef up or tame the transients to taste. All with a single instance!
In case you’re not after recreating the parallel compression effect, but instead want to simply explore “less heavily processed” settings, you can dial back the amount of processing with the Amount parameter. Unlike a dry/wet mix as examined above, its behavior is designed so that the audible effect spreads evenly over the parameter range.
Haven’t tried out Dynamic Grading yet? You absolutely should! Learn more here.