If you don’t know where to start with Dynamic Grading, look no further. Let us take you by the hand and guide you through your first encounter.
At very first sight, Dynamic Grading can look a bit intimidating and confusing. I guess that’s just a natural byproduct of shifting paradigms. But don’t worry, it is not that difficult if you know where to start. So in this article, we’ll guide you through some basic steps and exercises to get your workflow started.
The Ideal Test Signal
Besides your DAW of choice and the plugin (for example the free trial), you’ll need some audio to work with. While you could use anything really, no matter if vocals, speech, guitars or field recordings, in my opinion the best place to start is with acoustic drums, specifically the stereo bus.
Why the drum bus? It has everything we care about when talking about dynamics, and all in a typically well audible form: dynamics, high and low frequencies, “space between the notes”, reverberation. And you can do a lot of interesting things to this. It is by far the most illustrative type of signal to learn how Dynamic Grading behaves and how to use it. Afterwards you’ll be able to apply what you learned to just about everything.
So fire up your DAW and pick a song with acoustic drums in it or simply a drum loop from your DAW’s loop library.
Make Yourself Comfortable
Open a fresh instance of Dynamic Grading on your drum bus and start the loop. For now focus only on the main section and ignore the controls on the right. We’ll get to those later.
Observe the histograms for a few seconds while listening to the audio. In the initial state, both sides will look the same, just mirrored. What you see is a statistic of the dynamics in the audio. The flashing of the graphs show you where what you hear in real time contributes to the longer term graph. That way you should be able to see where in the dynamic range different hits of the drum loop are located. Accents and loud hits from the kick and snare will show up at the top, while hi-hats, ghost notes and other lower-level elements will show up further below.
While the audio is running, click the magic wand button at the bottom. You’ll notice that the markers on the histograms will switch to a new position. You’ve just used “Source Learn” for the first time, which automatically estimates the “Body Range” of your audio. This is the area between the two markers on the left side.
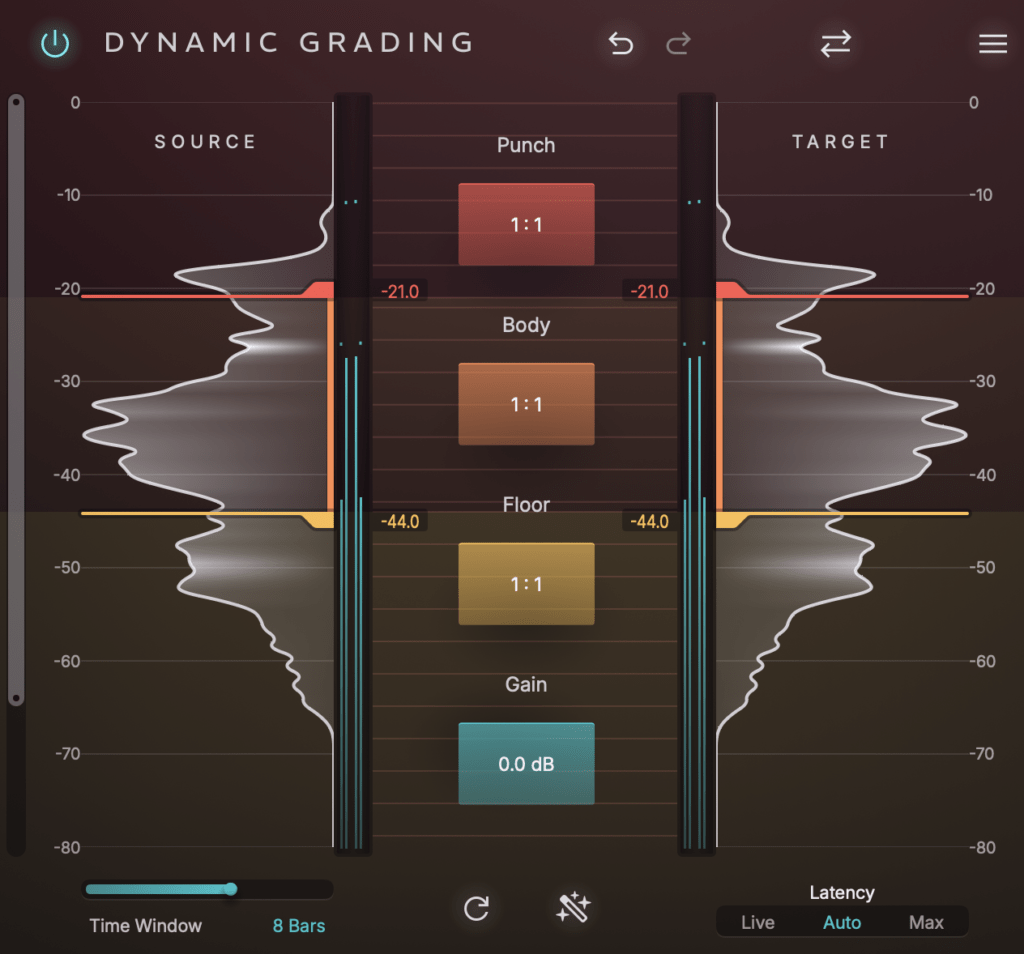
Everything above the top marker we call the “Punch Range”, while everything below the bottom marker is the “Floor Range”. You can learn more about the three ranges and their characteristics in The Anatomy of Audio Dynamics.
Your First Grading
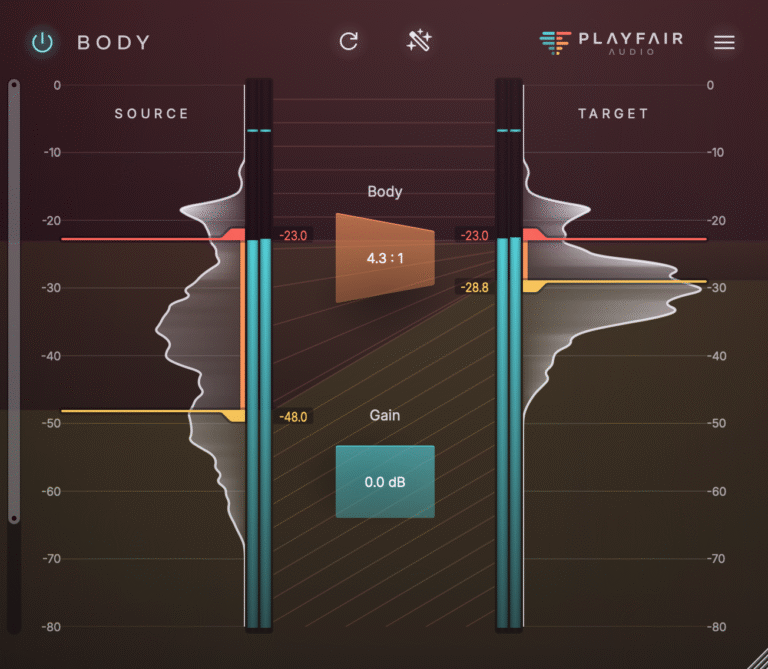
At this point you will feel the urge right away to just play with all the knobs and see/hear what happens. That’s natural, but hold your horses. For now, focus only on the Body Ratio. Turn the knob and see how it affects the target markers.
Turn it up to increase dynamic range. You are expanding the body ratio, and you will notice that the sound becomes tighter, dryer and more dynamic. Now turn it down towards the compression range, to a value of 5:1 or more. This means that e.g. 20 dB of dynamic range in the source are compressed to 4 dB of dynamic range in the output.
You’ll notice that the kit is now much denser, and that low level elements and reverb are louder, while the loudest hits remain as before. Don’t be afraid to go wild here!
Depending on how your brain is wired, you may find it more comfortable either to use the ratio knob, or move the target markers to specify where you want the body range in the result to be.
Tweaking Thresholds
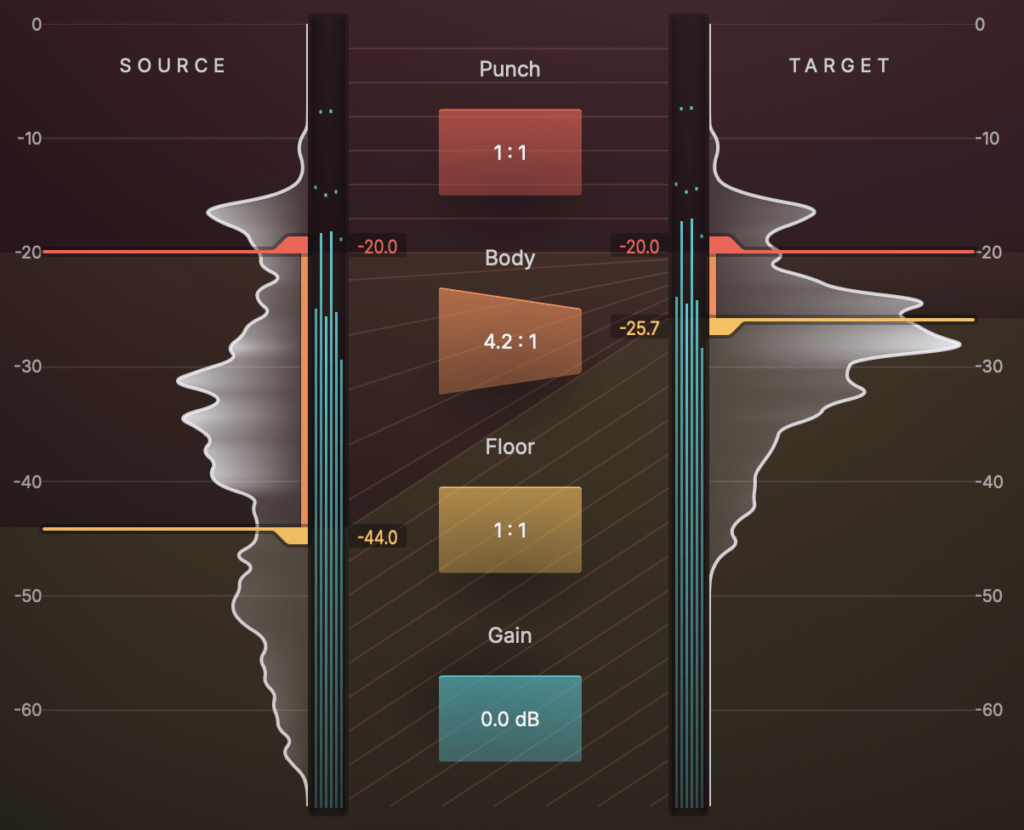
Continue with a good bunch of compression ratio in the body range and move to the source threshold markers on the left side. Drag these around to hear how the choice of thresholds affects the result. By adjusting the thresholds, you change what part of the dynamic range you are compressing exactly.
After some tweaking you’ll probably arrive at a setting that sounds about “right”. Notice how the histogram helps you find out where the music is.
Exploring More Possibilities
Until now you’ve only worked with the body range, but of course there’s much more you can do.
By compressing the body range, you’ve increased the low-level details, and you might find that a bit too much now. You can bring these details back down by applying expansion to the floor range. Notice how the dense body remains, but the side effect of increased reverb is kept in check. By applying a high amount of compression to the body range, and a high amount of expansion in the floor range, you can achieve a great kind of “gated reverb” effect. Or you can compress the floor range as well, which will exaggerate the reverb even more.
Now finally move on to the Punch Ratio. So far we’ve kept it at 1:1, which keeps the dynamics of the attacks and hits alive, even with heavy compression of the body. This is similar to what you’d achieve by mixing the original signal back in (parallel compression). But you can do more than just that. Expand the punch and listen to how the hits become snappier and the drums seem to jump out of your speakers. Watch your peak meters, of course!
Or compress the punch to tame the transients and move the signal more to the background. the punch range is where you create depth in your mix.
You can learn more about the effects you can achieve by compressing and expanding the different ranges in Manipulating Audio Dynamics for Fun & Profit.
Spectrum and Timing
Leave the ratios at a setting that you like and where the effects are well audible. You can now turn to the controls on the right side. Here’s where a lot of Dynamic Grading’s magic lies, although the default settings will serve you well most of the time.
Move the Spectrum slider and listen to how it affects the results. You’ll notice a sweet spot or area where results sound most natural and balanced. It will most of the time be somewhere around the default setting at the center.
When moving away from that sweet spot, you’ll notice that the balance of the effect especially between kick and snare drums will become weird in one or another way.
Move on to the Response Time slider. You’ll notice that the effect becomes smoother as you increase the response time. Fast response time will allow for drastic manipulation, while slow response times are better suited for more subtle leveling.
Finally, go back to a fast Response Time and play around with the Release Time. Notice how it also affects how drastic your changes are, but focuses on the release phases of the audio.
Final Exercise
We’ve come a long way now, and in a short time you’ve touched most of Dynamic Grading’s features and learned how the parameters affect the result. Congratulations, you’re ready to get to work!
But before I let you go, let’s wrap it up with a fun little experiment at the end:
- Set the Punch Ratio to the same value as that of the Body Ratio
- Set the Floor Ratio to 1:1 (double click it)
- Turn the Spectrum slider all the way to the left to a value of 0.0
- Set the latency mode to “Live”
What you’ve just done is to turn off most of the features that make Dynamic Grading unique. By doing that you’ve now turned it into a plain old conventional compressor. How does it sound in comparison? Decide for yourself.